
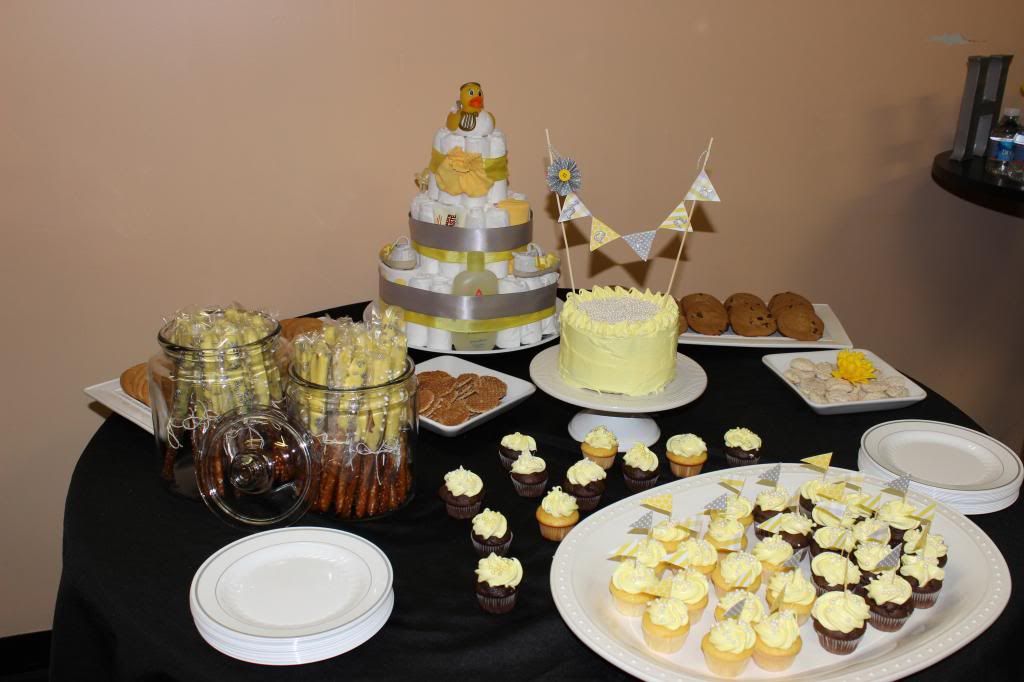
I’ve been to my fair share of baby showers over the years
and there always seemed to be a diaper cake of some sort around. I used to
think they were incredibly hard and time consuming to make until I looked a bit
closer and realized that they are super easy to make. Over the weekend, I had the privilege
of throwing a baby shower for my dear friend Kristina and you better believe I
made a diaper cake to go along with the décor.
For your viewing pleasure, here is how to make a diaper
cake.
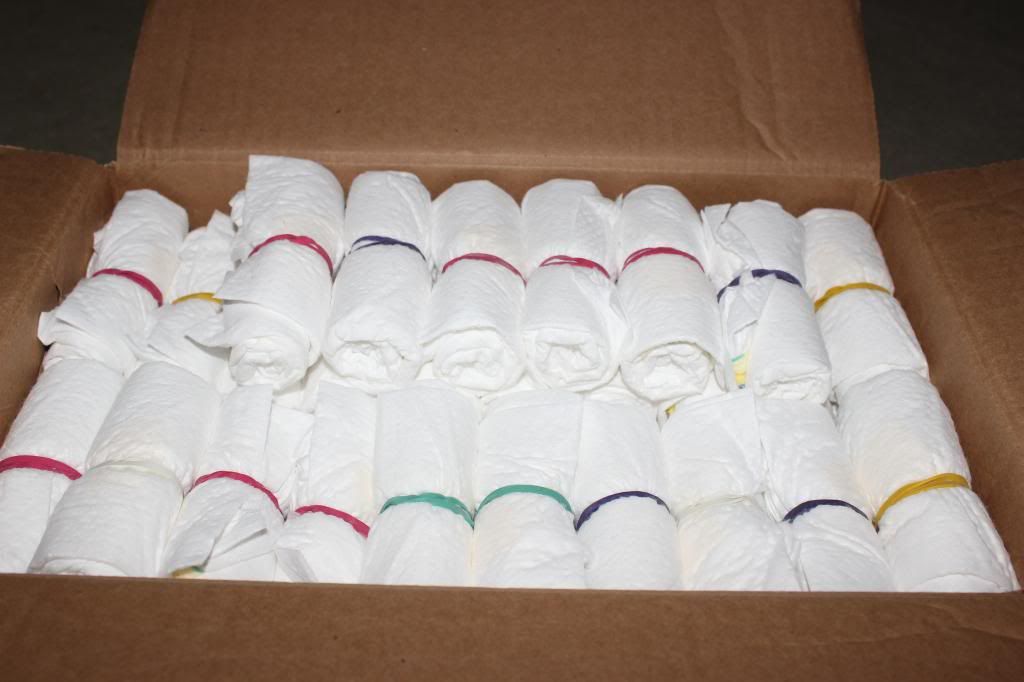
Items that you need:

-diapers (Obviously! You can use any size diaper, but I like
to use size 2 diapers so the Mom can enjoy the diaper cake a bit longer before
destroying it to actually use the diapers.)
-empty paper towel roll
-large rubber bands
-small rubber bands
-ribbon
-platter
-fun baby items in the color scheme of your choice (i.e. wash cloth, pacifier, baby shampoo, shoes, baby powder, fork and spoon, whatever you want)
-empty paper towel roll
-large rubber bands
-small rubber bands
-ribbon
-platter
-fun baby items in the color scheme of your choice (i.e. wash cloth, pacifier, baby shampoo, shoes, baby powder, fork and spoon, whatever you want)
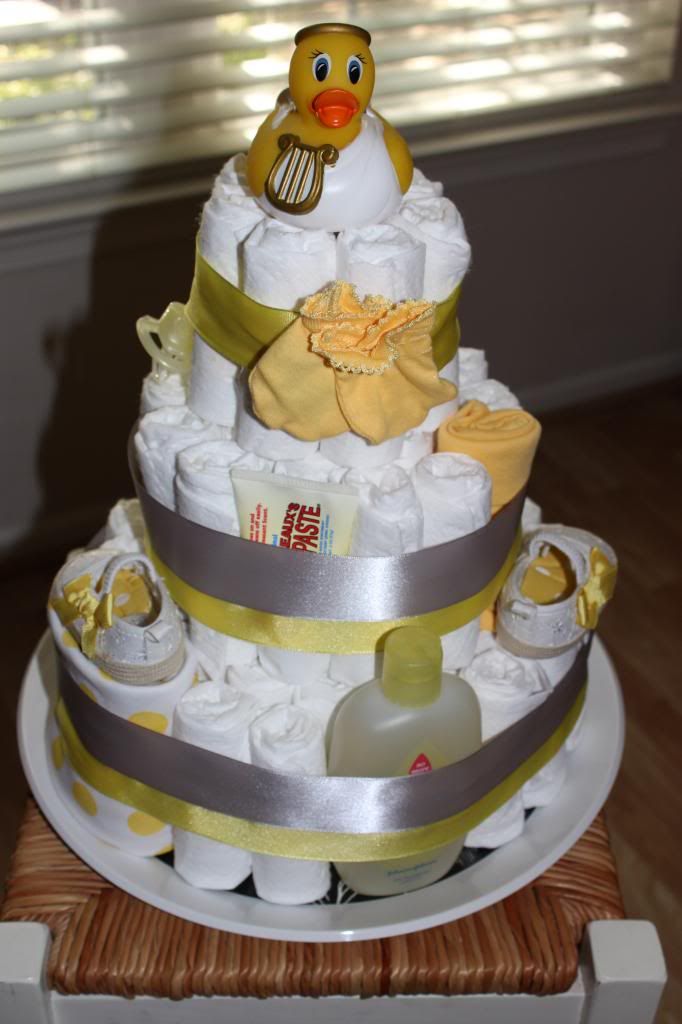
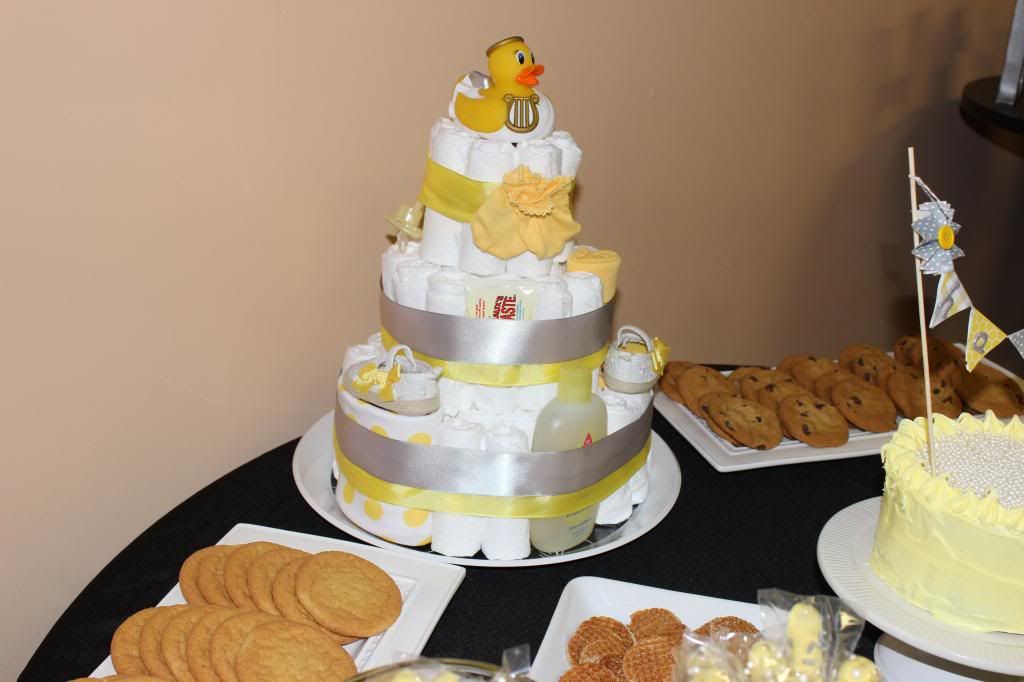
1.) Roll the diapers up and secure with small rubber bands.
To make the same size diaper cake that I made you will need 66 diapers to start
with. The actual number of diapers will decrease once you start adding in the
fun baby items.
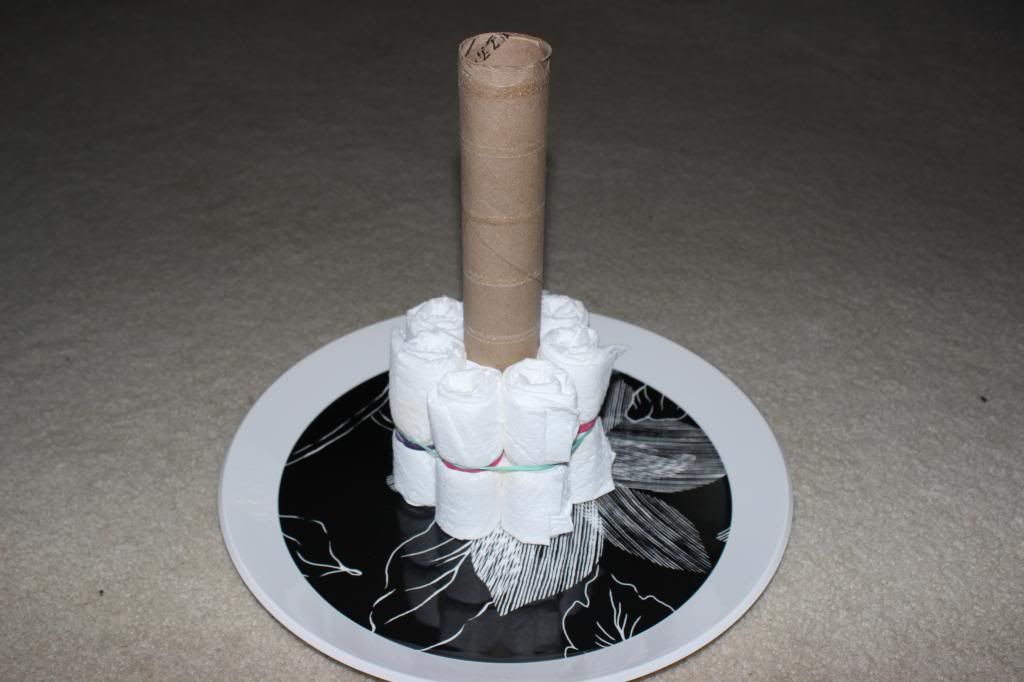
2.) Place the paper towel roll on the platter and start
placing diapers for the first circle of the bottom cake layer (7 diapers)
around the paper towel roll. Take a large rubber band and secure around the 7
diapers. (If you have someone available to assist you with this step, it will
be helpful. One of you can hold the diapers in place and the other can secure
the large rubber band around the circle.)
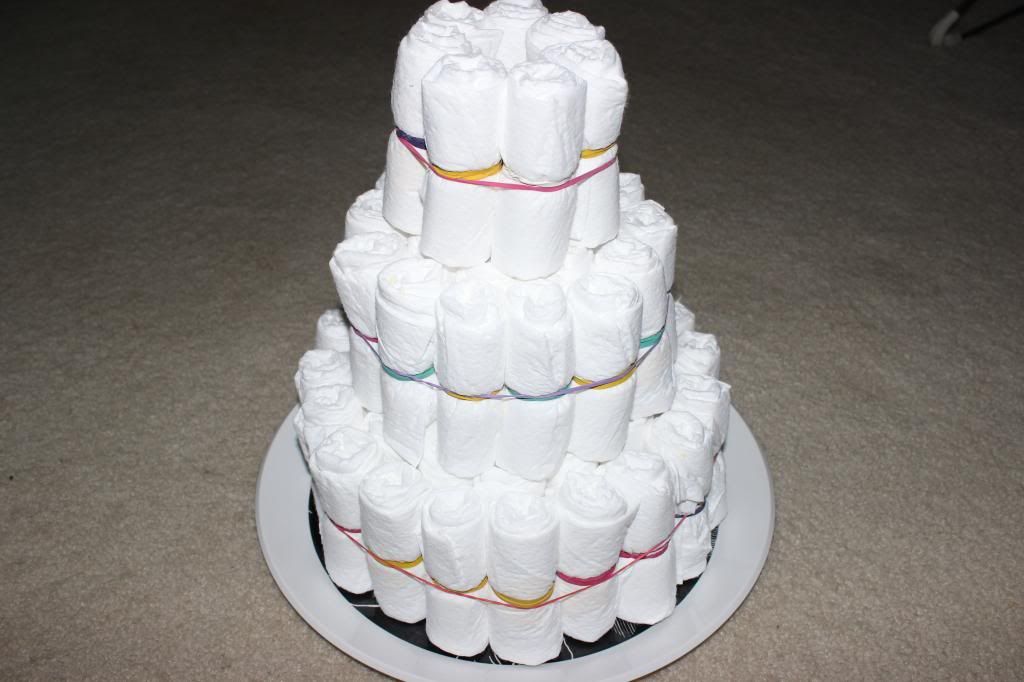
3.) Continue the same process with the second (13 diapers)
and third (19 diapers) circles of the bottom cake layer.

4.) Repeat for the second cake layer, this time only using
two circles (7 and 13 diapers).
5.) Repeat for the top cake layer, this time only use one
circle (7 diapers).
6.) Replace select diapers with fun baby items to add some
color and pop to your cake.
7.) To hide the rubber bands and create a decoration on the
cake, wrap large ribbon around each layer and secure with a safety pin in the
back. You can use whatever kind of ribbon you want.
 |
| Aren't those shoes adorable? |
8.) Add the cake topper. A rubber ducky or a small stuffed
animal works great.
There you go – eight simple steps! If you have any
questions, please leave them in the comments section below.


Love this, simple and adorable!
ReplyDeleteCarly
www.lipglossandcrayons.com
That is awesome, thanks for sharing. :) I've always wondered how to make those, haha. I'm very crafty-challenged.
ReplyDeleteNow this was interesting
ReplyDeleteLOOOOVE this idea, lindsay! what a great gift idea!
ReplyDeleteLooks beautiful! The party came together perfectly!!!!
ReplyDeleteI've never seen anything like this before - what an ingenious idea!
ReplyDelete